
Drum Kit Elements Explained for Beginners
Drum Kit Elements Explained

Content
Content
Understanding what makes up a drum kit can feel overwhelming at first. You're staring at all these drums, cymbals, and metal stands wondering what each piece does and why it matters. But once you break down the drum kit elements into their individual components, the whole setup starts to make sense. Each part has a specific job, and together they create the foundation for almost every style of music you hear. Whether you're thinking about buying your first kit or just want to understand what your favorite drummer is actually playing, knowing the parts of a drum kit gives you a much clearer picture of how rhythm works.
What Are the Main Parts of a Drum Kit
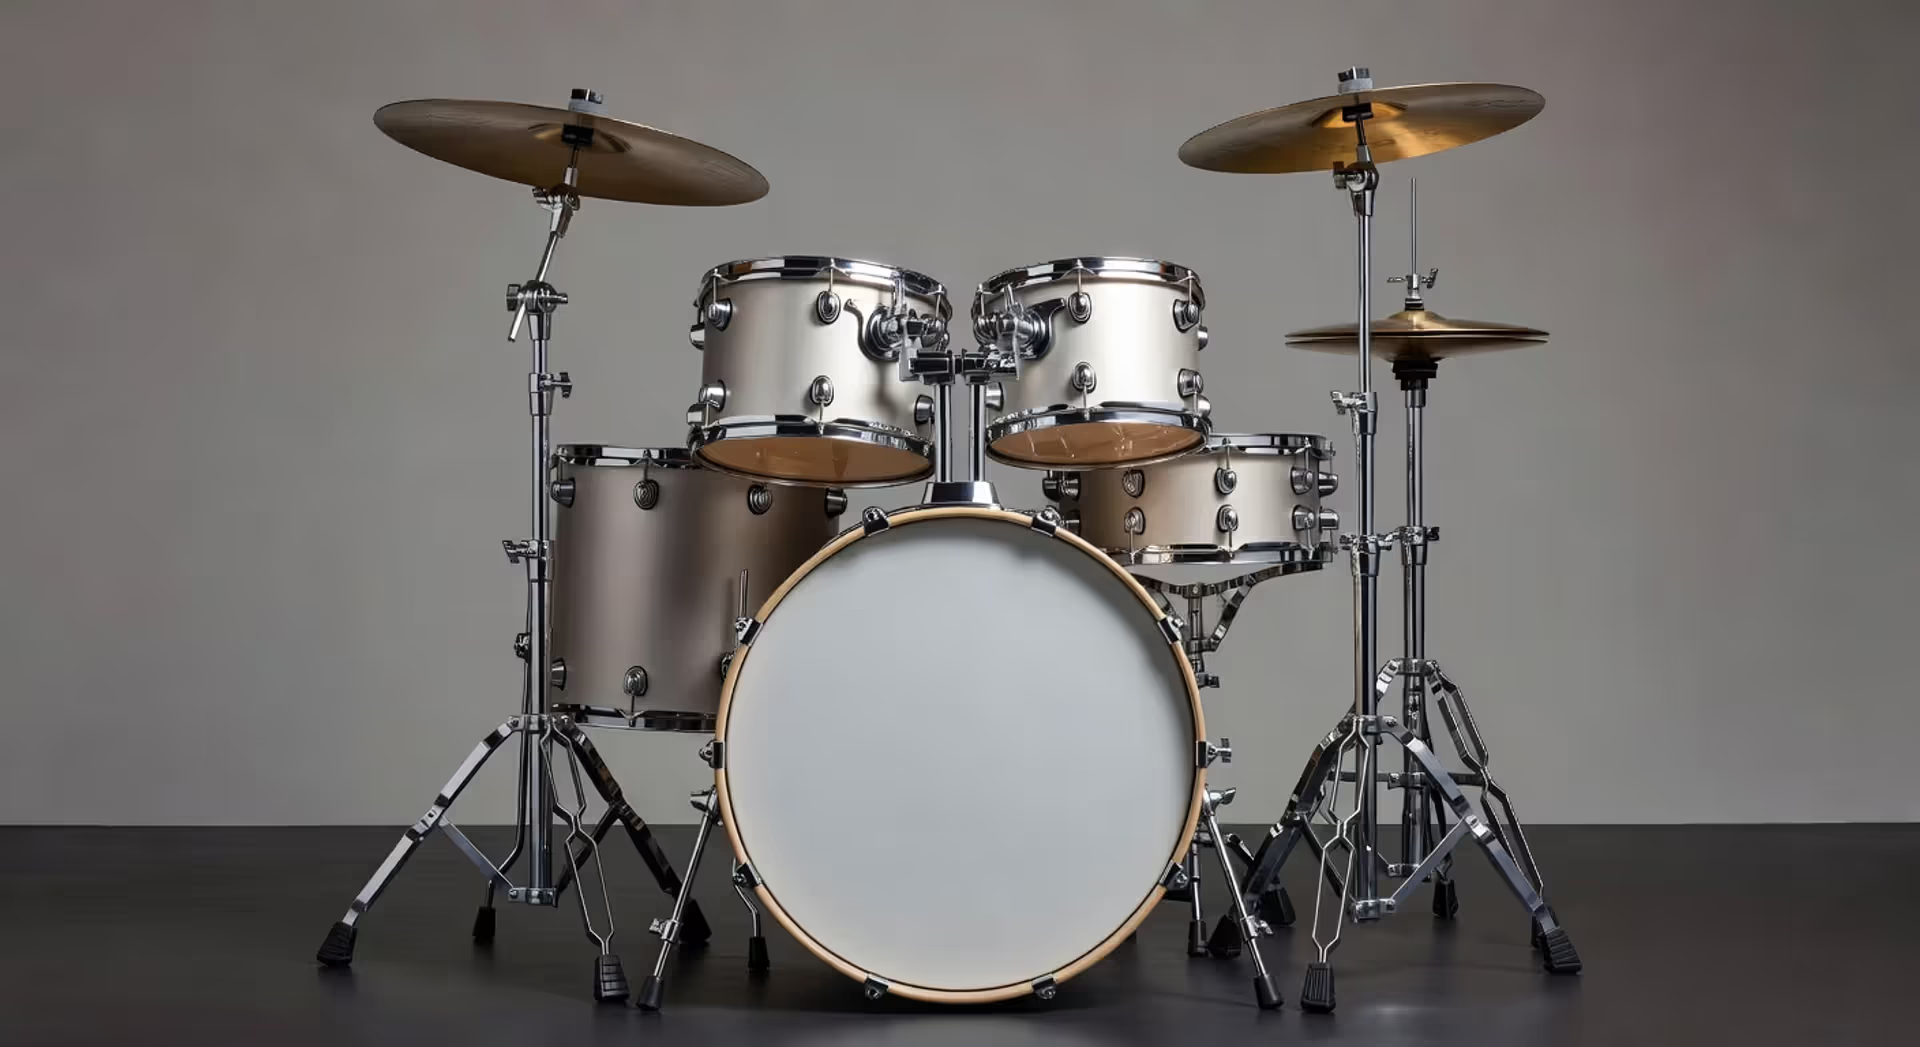
A standard drum set breaks down into three main categories: shell drums, cymbals, and hardware. The shell drums are the round, hollow pieces that give you those deep, resonant tones. Cymbals provide the bright, shimmering sounds that cut through a mix. Hardware holds everything together and lets you actually play the kit.
Most beginner kits include five shell drums and three or four cymbals. That's your starting point. The drum kit terminology can get technical fast, but the basics are straightforward. You've got your bass drum on the floor, a snare drum in front of you, a few toms mounted around the kit, and cymbals positioned where your sticks can reach them easily.
The standard drum set layout puts the bass drum front and center because you play it with a foot pedal. Your snare sits between your knees. Toms arc around you from left to right (or right to left if you're left-handed). Hi-hat cymbals sit to your non-dominant side, within easy reach of your off hand.
This arrangement isn't random. It evolved over decades to give drummers the most efficient path between sounds. Every component sits where it does for a reason.
Shell Drums and Their Functions
Shell drums form the tonal heart of any kit. They're called "shells" because they're hollow cylinders, usually made from wood or metal, with drumheads stretched across both ends. When you hit the top head, the air inside vibrates and creates sound. The bottom head (called the resonant head) vibrates in sympathy, giving each drum its characteristic voice.
The components of a drum set vary in size and depth, which changes their pitch and tone. Bigger shells produce lower sounds. Smaller ones ring higher.
Bass Drum
The bass drum is the biggest piece in your kit, typically ranging from 18 to 24 inches in diameter. Most standard setups use a 22-inch bass drum. You play it with a foot pedal, which drives a beater into the drumhead.
This drum provides the low-end punch in almost every beat. It's the heartbeat of the groove. In rock music, you'll hear it on beats one and three (or all four beats in faster songs). In jazz, it's more subtle, adding accents and supporting the ride cymbal pattern.
The bass drum sits on the floor, angled slightly back. Two legs keep it stable. The pedal attaches to the hoop at the bottom of the drum, and the beater strikes the center of the front head.
Snare Drum
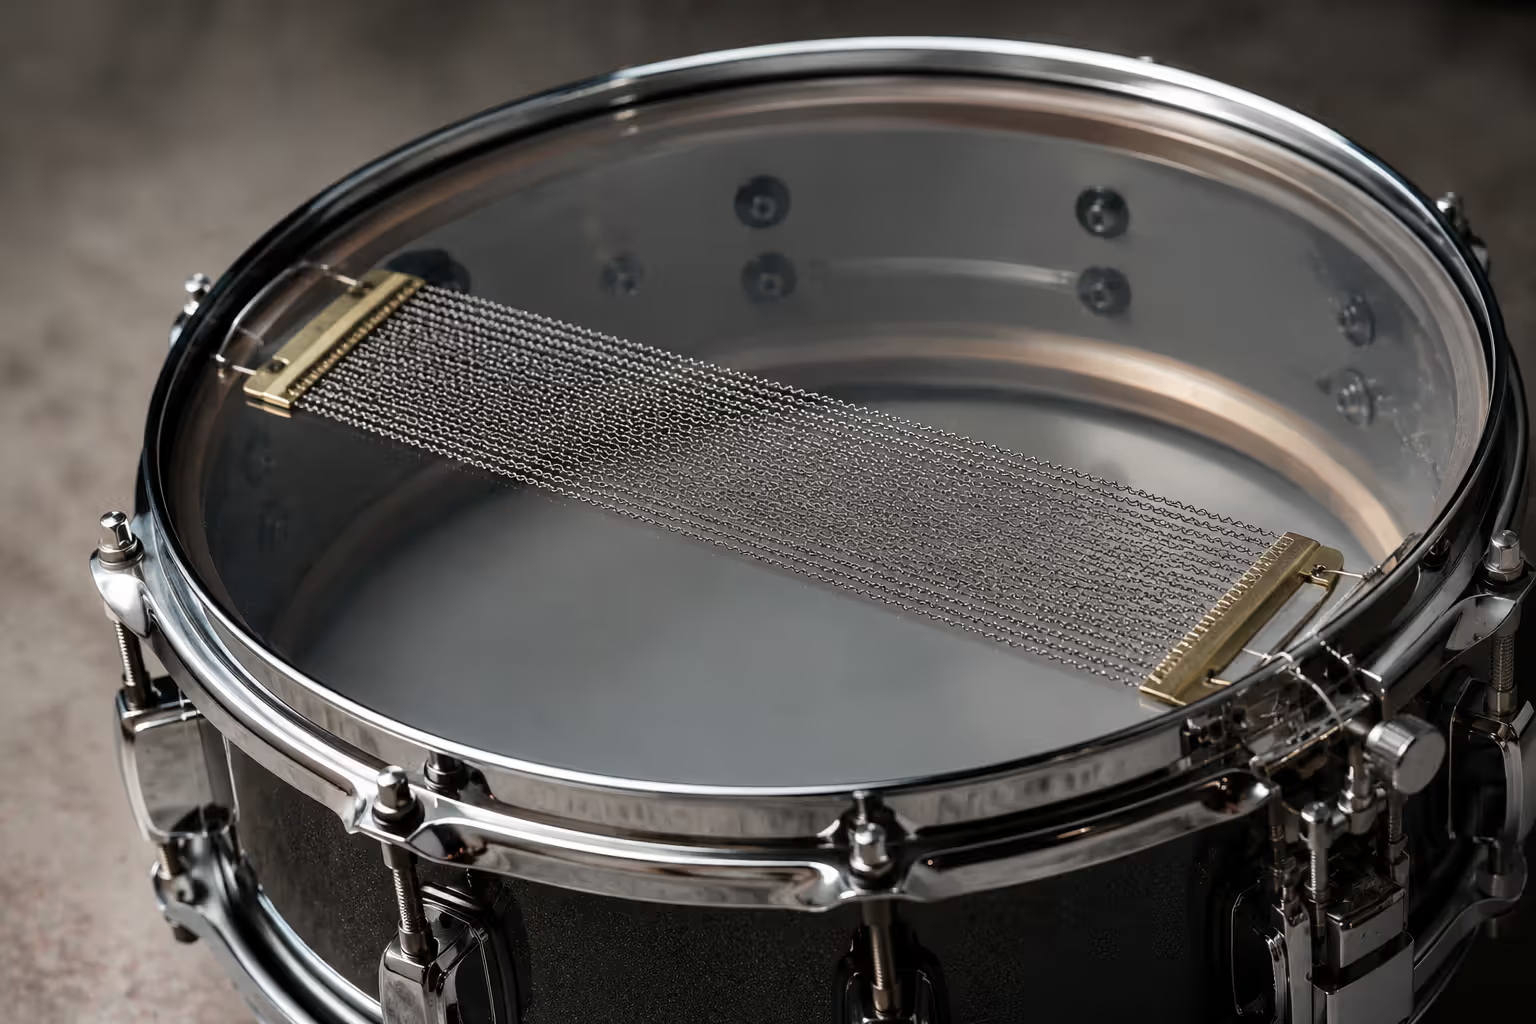
The snare drum sits on a stand directly in front of you, usually at about waist height when you're seated. It's typically 14 inches in diameter and anywhere from 5 to 8 inches deep. What makes it unique is the set of metal wires (called snares) stretched across the bottom head.
When you hit the top head, those wires rattle against the bottom head, creating that sharp, crisp "crack" sound. You can turn the snares off with a throw-off lever on the side, which gives you a more tom-like tone.
Author: Miles Arbordale;
Source: lamat-records.com
The snare is probably the most played drum in your kit. It lands on beats two and four in most popular music, creating the backbeat that makes you want to clap along. You can play it loud, soft, on the rim, or in the center—each technique produces a different sound.
Tom-Toms
Toms come in various sizes and serve as your melodic drums. A standard 5-piece kit includes two mounted toms (attached to the bass drum or a separate stand) and one floor tom (which has its own legs).
Typical sizes are 10 and 12 inches for the mounted toms, and 14 or 16 inches for the floor tom. The drum kit anatomy places smaller toms to your left (if you're right-handed) and larger ones to your right, creating a pitch range from high to low as you move across the kit.
Toms don't have snares, so they produce pure, resonant tones. Drummers use them for fills—those exciting runs between sections of a song. They're also great for building tension or adding melodic color to a groove.
The pattern I see most often is beginners hitting toms too hard. They're designed to resonate, so you don't need to bash them. A controlled stroke lets the shell sing.
Cymbals and Their Roles in a Drum Set
Cymbals are thin discs of metal alloy—usually bronze—that vibrate when struck. They're the bright, shimmering counterpoint to the drums' deeper tones. The essential drum kit pieces in the cymbal family each serve distinct musical purposes.
Cymbal sizes are measured in inches across the diameter. Thicker cymbals are louder and have more focused sound. Thinner ones are quieter but more complex and expressive.
Hi-Hat Cymbals
The hi-hat consists of two cymbals mounted on a stand with a foot pedal. When you press the pedal, the top cymbal comes down on the bottom one. Release it, and they separate.
Standard hi-hats are 14 inches in diameter, though 13-inch and 15-inch versions exist. You can play them closed (pedal down), open (pedal up), or anywhere in between. You can also "chick" them by just pressing the pedal without hitting with a stick.
Most beats revolve around a hi-hat pattern. In rock, that's usually eighth notes or sixteenth notes. In jazz, it's a swing pattern with the pedal closing on beats two and four. The hi-hat sits to your left (for right-handed players), positioned so your left stick can reach it comfortably.
Crash Cymbals
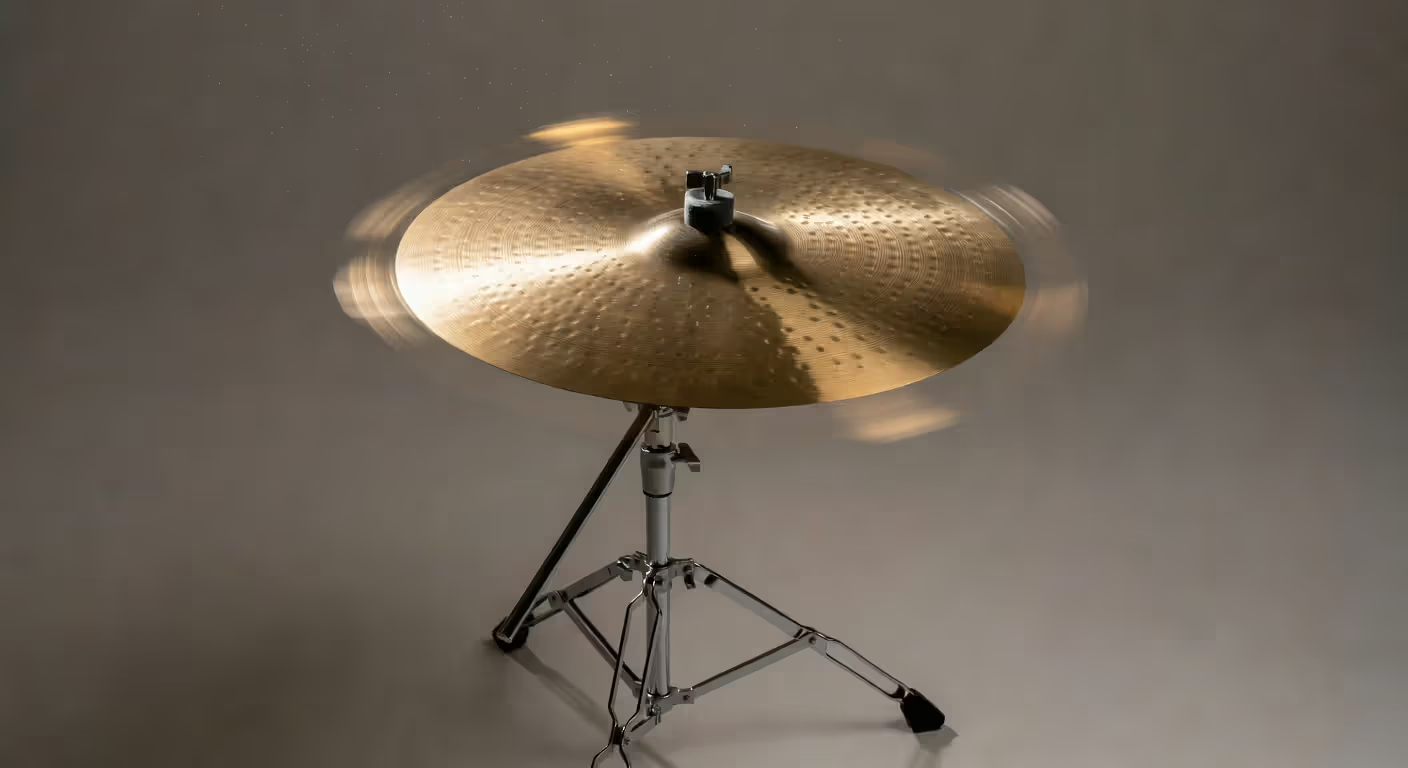
Crash cymbals create big, explosive accents. They're thinner than rides, which lets them "open up" quickly with a loud, washy sound. Sizes range from 14 to 20 inches, with 16 and 18 inches being most common.
Author: Miles Arbordale;
Source: lamat-records.com
You hit a crash at climactic moments—the start of a chorus, the end of a fill, or any time you want to emphasize a musical peak. The sound decays relatively quickly compared to a ride, which makes crashes perfect for punctuation rather than timekeeping.
Most kits have at least one crash cymbal, positioned above and slightly to your right. Many drummers add a second crash on the left side for easier access during complex patterns.
Ride Cymbal
The ride cymbal is larger and heavier than a crash, typically 20 or 22 inches. It produces a clear, defined "ping" when you hit it on the bow (the main surface area). Hit the bell (the raised dome in the center), and you get a louder, more focused tone.
Jazz drummers use the ride as their main timekeeping cymbal, playing intricate patterns while the hi-hat chicks on two and four. Rock drummers switch to the ride for quieter sections or to change the texture of a groove.
The ride sits to your right, positioned so you can reach both the bow and the bell without stretching. Some drummers angle it nearly flat, others tilt it significantly—it's a matter of personal preference and playing style.
Hardware and Mounting Components
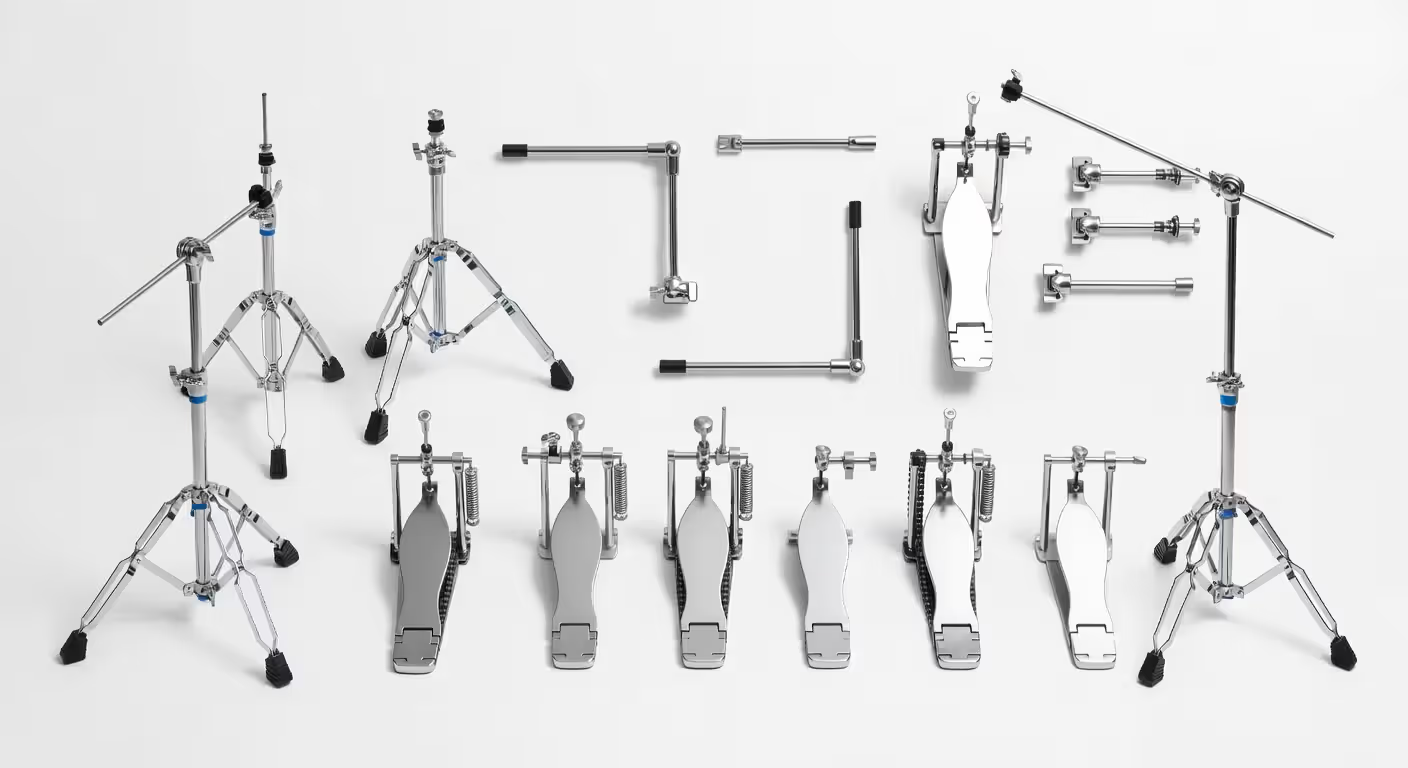
Hardware doesn't make sound, but you can't play without it. What makes up a drum kit from a structural standpoint includes stands, pedals, a throne, and mounting systems. This is the skeleton that holds your drums and cymbals in place.
Cymbal stands come in straight and boom configurations. Straight stands are simpler and more stable. Boom stands have an extending arm that lets you position cymbals over your drums, which saves floor space and makes complex setups easier to arrange.
The bass drum pedal is probably the most mechanically complex piece of hardware. It uses a chain, strap, or direct-drive system to transfer the motion of your foot to the beater. Chain drives are most common. Direct drives offer faster response but cost more.
Your snare stand needs a basket that holds the drum securely while letting it resonate freely. Good ones have fine adjustment knobs for height and angle. Cheap ones wobble and squeak—not what you want when you're trying to play.
Tom mounts attach to the bass drum or to separate stands. The traditional setup uses a mount on top of the bass drum for two toms. Modern kits often use separate stands for better resonance, since mounting toms directly to the bass drum can dampen its sound slightly.
Author: Miles Arbordale;
Source: lamat-records.com
The drum throne (your seat) matters more than beginners realize. You'll spend hours on this thing. A wobbly or uncomfortable throne leads to bad posture, which leads to fatigue and potentially injury. Look for something with solid construction and adequate padding.
Don't forget the small stuff: wing nuts, felts, and sleeves. These little pieces protect your cymbals and keep everything from rattling. Lose a wing nut mid-gig, and you'll understand why drummers carry a spare parts bag.
How Drum Kit Components Work Together
The standard drum set layout isn't just about convenience—it's about musical flow. When components are positioned correctly, you can move between them smoothly without thinking. Your muscle memory takes over.
Start with the throne. Sit so your thighs are parallel to the floor or angled slightly downward. Your bass drum pedal should fall naturally under your dominant foot. The hi-hat pedal goes under your other foot.
Position your snare so you can hit the center of the head without reaching or hunching. It should be slightly below your waist, angled just a bit toward you. This gives you the best stick rebound and keeps your wrists in a comfortable position.
Mounted toms should arc around you at roughly the same height, angled slightly toward your playing position. You shouldn't have to reach up or lean to hit them. Floor toms sit to your right (for right-handed players), positioned so the top head is about the same height as your snare.
Hi-hats go to your left, close enough that your left hand can play them without stretching across your body. The top cymbal should be roughly level with your snare or slightly higher.
Crash and ride cymbals position above and around your drums, within easy reach but high enough that you don't hit stands or drums when you strike them. Angle them slightly away from you—this gives you the best sound and protects your wrists.
The drum kit anatomy creates a circular workspace. Everything important sits within your natural reach. You can hit any drum or cymbal with minimal movement. That efficiency is what lets drummers play complex patterns at high speeds without exhausting themselves.
A common mistake is spacing things too far apart. New drummers think they need room to "wind up" for big hits. But proper technique uses the stick's rebound, not huge arm movements. Keep everything close and comfortable.
Common Drum Kit Configurations
The "piece count" in drum kit terminology refers to shell drums only—cymbals aren't included in that number. A 5-piece kit has five drums: bass, snare, two mounted toms, and a floor tom. That's the standard configuration you'll see in most music stores and on most stages.
A 4-piece kit drops one of the mounted toms, usually leaving you with bass, snare, one mounted tom, and a floor tom. This setup became popular with vintage rock drummers and is making a comeback. It's simpler, takes up less space, and forces you to be more creative with fewer options.
Expanded kits add more toms, cymbals, and sometimes auxiliary percussion. Progressive rock and metal drummers often play 7-piece or larger kits with double bass drums (or a double pedal), extra toms spanning a wide pitch range, and multiple crashes and effects cymbals.
Here's how standard configurations compare:
| Configuration | Shell Drums Included | Typical Cymbals | Best For | Setup Complexity |
| 4-Piece | Bass, snare, 1 mounted tom, floor tom | Hi-hat, crash, ride | Jazz, vintage rock, small spaces | Low |
| 5-Piece | Bass, snare, 2 mounted toms, floor tom | Hi-hat, crash, ride | Rock, pop, general use | Medium |
| 6-Piece | Bass, snare, 3 mounted toms, floor tom | Hi-hat, 2 crashes, ride | Fusion, progressive styles | Medium-High |
| 7-Piece+ | Bass, snare, 4+ toms (multiple floor toms) | Hi-hat, 2+ crashes, ride, effects | Metal, progressive rock | High |
| Double Bass | 2 bass drums, snare, multiple toms | Multiple crashes, rides, effects | Heavy metal, technical styles | Very High |
Electronic drum kits deserve mention. They use rubber or mesh pads instead of acoustic shells, and all sound comes through headphones or an amplifier. The parts of a drum kit remain conceptually the same—you still have a bass pad, snare pad, tom pads, and cymbal pads arranged in a familiar layout.
Electronic kits are quieter, more compact, and offer hundreds of different sounds at the touch of a button. But they feel different under the sticks and don't have the same acoustic response. Many drummers use them for practice or recording, then switch to acoustic kits for live performance.
Genre influences what makes up a drum kit too. Jazz drummers often prefer smaller bass drums (18 or 20 inches) and thinner cymbals for a more sensitive, articulate sound. Metal drummers want bigger bass drums (22 or 24 inches) and heavier cymbals that can cut through distorted guitars.
Every element of the drum kit serves a purpose in the conversation between rhythm and melody. Understanding what each component brings to that conversation—the bass drum's foundation, the snare's punctuation, the cymbals' color—that's when you stop just keeping time and start making music.
— Carter Beauford
The simpler option usually wins here, especially when you're starting out. A well-tuned 5-piece kit with quality cymbals will serve you better than a sprawling 9-piece setup with mediocre hardware. You can always add pieces as your skills and musical needs grow.
FAQ: Drum Kit Elements Questions Answered
Now you've got a solid foundation in drum kit elements. Each component has its place and purpose, from the thundering bass drum to the shimmering ride cymbal. Start with the basics, learn how each piece contributes to the overall sound, and you'll develop an intuition for how to use them musically. The technical knowledge matters, but what really counts is how you bring these parts together to create rhythm, energy, and feeling.
Related Stories

Read more
Read more


The content on this website is provided for general informational and educational purposes only. It is intended to explain concepts related to music production, recording, mixing, mastering, music industry roles, and distribution.
All information on this website, including articles, guides, and examples, is presented for general educational purposes. Results and success in music production may vary depending on skill level, equipment, and effort.
This website does not provide professional music production services or guarantees of commercial success, and the information presented should not be used as a substitute for consultation with qualified music producers, audio engineers, or music industry professionals.
The website and its authors are not responsible for any errors or omissions, or for any outcomes resulting from decisions made based on the information provided on this website.